Think you can't grow cannabis just because it's winter? You thought wrong! With the right setup, you can successfully cultivate cannabis indoors even in sub-zero temperatures. Here is a step-by-step guide on how to do it.
In principle, the following applies to beginners and professionals alike: when growing cannabis, there are numerous factors that need to be taken into account and various ways to achieve successful yields. The most important thing is: don't panic, no master has fallen from the sky and one of the best things about growing is watching and learning for the next grow!
Step 1: The right room
Choose a well-insulated room or a special grow box in which you can optimally control the conditions. Garages or cold basements are less suitable without additional insulation. Your goal: The temperature should be constant and controllable.
Step 2: Set up the lighting
There is a lack of sunlight in winter, so artificial lighting is essential. High-quality LED grow lights or HPS lamps are ideal as they provide the right light wavelengths for plant growth. A cycle of 18 hours of light and 6 hours of darkness in the growth phase, and 12 hours of light and 12 hours of darkness in the flowering phase is optimal.
Step 3: Temperature control
Your plants love temperatures between 20°C and 28°C. Use fan heaters or heating mats to ensure this temperature even in a cold room. Make sure that the temperatures do not fluctuate too much - this could inhibit the growth of the plants. Please note: When growing indoors, it is important to avoid safety risks such as overheating and short circuits, especially when using fan heaters and heating mats. Make sure you only use high-quality, moisture-resistant devices with overheating protection and wire the electrical system correctly. Use thermostats to control the temperature, install smoke detectors and ideally keep a fire extinguisher to hand. This will minimize the risk of fire and create a safe environment for your growing project.
Step 4: Ventilation and air circulation
Good air circulation prevents mold growth and keeps the plants healthy. It is therefore best to install fans that bring fresh air into the tent and remove warm, stale air. An exhaust air system with an activated carbon filter ensures that stale air and odors are efficiently removed.
Step 5: Regulate humidity
Cannabis requires a humidity level of 40-70%during the growth phase . During the flowering phase, the humidity should be lowered to 40-50% to prevent mold growth. A humidifier can help if the air is too dry, while a dehumidifier will regulate excessive humidity.
Step 6: Choosing the medium - soil or hydroponics?
- Soil: Easier for beginners. High-quality cannabis soil with the right nutrients provides a stable foundation.
- Hydroponics: More efficient, as the plants are supplied directly with water and nutrients. However, this method requires more precise management of the nutrient supply.
Step 7: Nutrient supply
In winter, the dry heating air can lead to greater evaporation of water, which affects nutrient uptake. Make sure that you use a balanced nutrient solution for the growth and flowering phases to prevent deficiency symptoms.
Step 8: Timing and patience
Depending on the variety, it can take 8 to 14 weeksfrom sowing to harvest . Ensure constant care throughout this time - regularly check light cycles, temperature, humidity and nutrients.
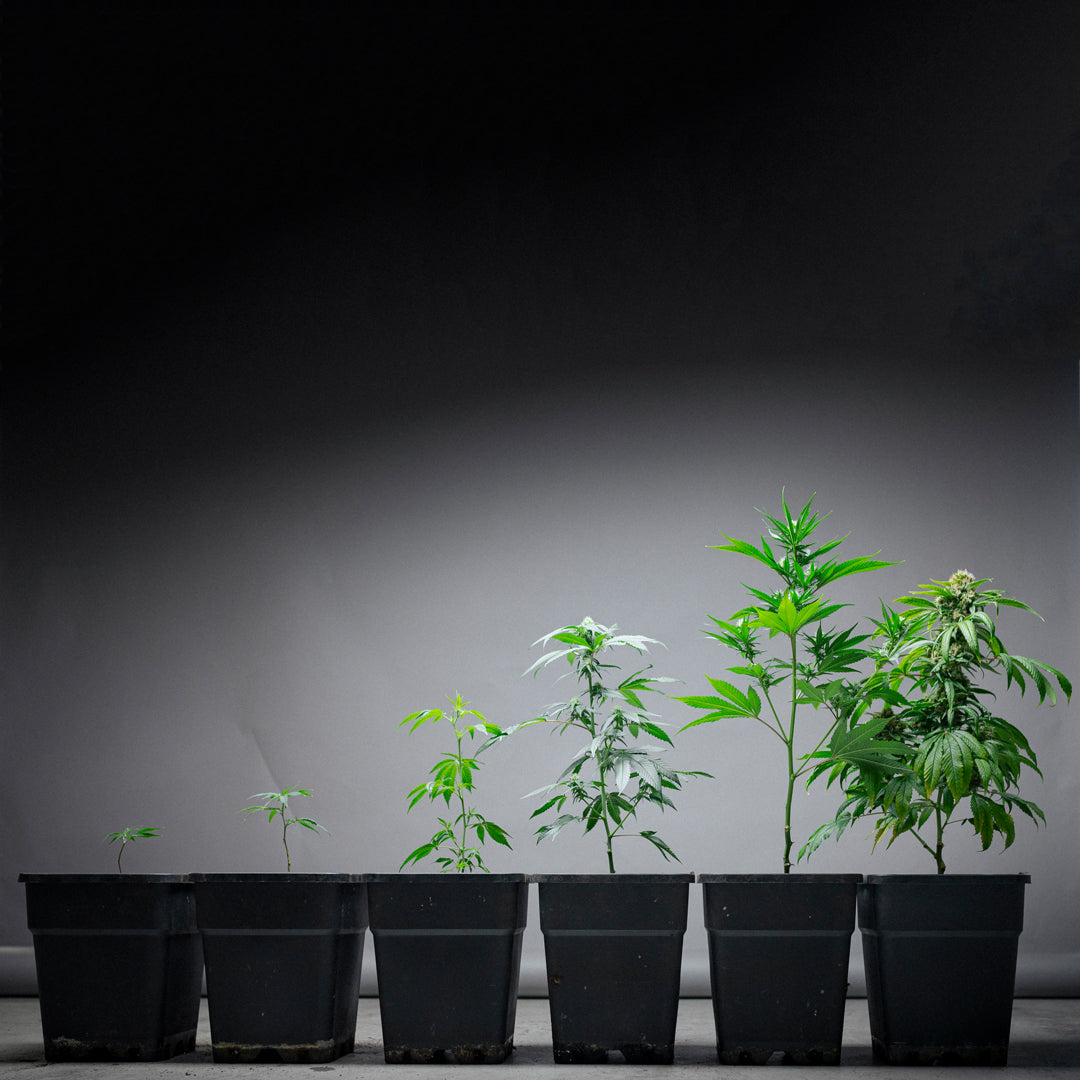
- Growth phase (vegetative phase)
In the growth phase, the plant concentrates on root and leaf growth. This phase usually lasts 4 to 6 weeks, but can vary depending on the variety and cultivation goals. This phase is easily recognized by the strong growth of leaves and stems - and the lack of flowers or pre-flowers. The plant develops many side shoots here in order to maximize the surface area for flower formation.
- When to initiate the flowering phase?
The changeover takes place by changing the light cycle. In the growth phase, the light cycle is typically 18 hours of light and 6 hours of darkness. To send the plant into flowering, you change the light cycle to 12 hours of light and 12 hours of darkness.
- Recognition feature: When to switch?
An important clue as to when you should initiate the flowering phase is the size and growth pattern of your plant. The plant can grow up to 50-100% larger during the flowering phase. You should therefore make sure that the plant has reached about 50% of the desired final size before making the switch. If you see pre-flowers - small flower buds on the nodes (nodes where the leaves grow out of the stem) - this is a sign that the plant will soon be ready for flowering.
- Flowering phase
After the switch to the 12/12 light cycle, the flowering phase begins. This is when the plants produce visible flowers (also known as buds). Growth slows down and the plant puts its energy into flower formation. Trichomes (small resin glands) and fine white hairs (pistils) begin to form.
Step 9: Harvest time
When the flowers are ripe, i.e. when about 70-90% of the trichomes are milky to amber-colored, the time is ripe for harvesting. Cut the plants, hang them up in a dark, well-ventilated room to dry slowly.
Here are a few tips that can help you get the densest and most compact buds possible:
- Light intensity: the buds will develop more densely if they receive enough intense light during the flowering phase. High-quality LED lamps or HPS lamps with sufficient power (approx. 600-1000 watts) can increase bud density. Make sure that the light reaches the entire plant evenly.
- Air circulation: Good air circulation helps to make the buds firmer. Install fans to ensure that air circulates well around the plants.
- Temperature and humidity: During the flowering phase, the temperature should be between 20-26°C and the humidity between 40-50%. Too high humidity can cause the buds to remain fluffy and susceptible to mold.
- Nutrients: Ensure that the plants receive the right flowering nutrients during the flowering phase , especially sufficient phosphorus and potassium, which are crucial for bud development. Use bloom boosters to support the growth of the flowers.
- Trimming and lollipopping: During the flowering phase, remove the lower leaves and smaller shoots (lollipopping) so that the plant concentrates its energy on the upper buds. This makes the upper buds firmer and more compact.
- Correct drying: After harvesting, slow drying plays a major role. Hang the plants in a dark room with about 50% humidity and let them dryfor about 7-10 days. Drying too quickly can make the buds fluffy.
But which seeds are right for me?
There are different varieties of cannabis that have different needs. Sativa strains are generally larger and have longer flowering times, while indica strains flower more compactly and faster. Autoflowering strains flower independently of light cycles and are more resistant to environmental conditions. Feminized seeds do not flower automatically. However, growers can better control the yield of the flowers.
At Marry Jane you will find no less than 20 different seeds to choose from. Click here for 187 Sweedz, the seeds of the 187 Strassenbande, and here for MJ Seeds.
With this step-by-step guide, nothing stands in the way of your successful indoor grow in winter! Have fun and good luck - your Marry Jane Team
All information without guarantee.
Note on the use of language:
For reasons of readability, we do not use gender-neutral language in our texts. However, it goes without saying that all genders are always addressed equally. At Marry Jane, we attach great importance to inclusion and equality - everyone is welcome here, regardless of gender, identity or origin.
